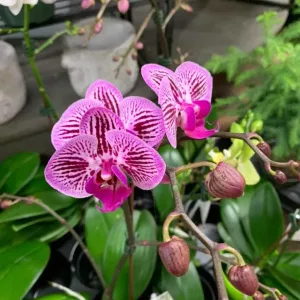
I have had a request for an article on how to grow and transplant orchids. Some orchids are easier to grow than others. Cattleya, Phalaenopsis and Paphiopedilum orchids are amongst the easiest to grow and are recommended for most beginner orchid growers. I’ve done some research and here is some basic information for the beginner.
There are over 30,000 species of orchids world-wide and over 200,000 different varieties. The most common types of orchids found for sale include Phalaenopsis, Dendrobium and Oncidium. Phalaenopsis is known as the “moth orchid” and is extremely popular among beginners; the genus Dendrobium contains about 1,200 species of orchids and is the classic epiphyte of orchids; Oncidiums are characterized by column wings and a callus at the lip of the flower.
Low-light orchids (Phalaenopsis and Oncidium) do best if they are set near a north or east facing window. Moderate to high-light orchids (Cattleya and Dendrobium) need more light. Place them near a south or west facing window.
Water your orchids once per week, providing a good soak. Allow all extra water to drain away from the roots before setting them back on the tray. Allow the soil surface to dry slightly before watering again.
Please don’t water your plant by setting ice cubes on the soil surface. These are tropical plants! They never have to deal with ice or even cold temperatures. If you give them a steady supply of cold water, roots will eventually die. Instead use tepid water.
During the season of active growth, fertilize your plants each week with a ¼ strength mix of Orchid Food. On the fifth week, use plain water to flush any accumulated fertilizer salts out of the soil. Keep the plant in indirect sunlight until the flower spike shows. Once the spike is around 5 inches tall, brace it with a small stake.
Many orchids are comfortable being root-bound. In general, you will need to re-pot your orchid every two years or whenever you notice that the lower leaves have died. You may also need to re-pot your orchid if the plant outgrows its pot or if the roots are dying. They should only be transplanted during the warm season, between June and September.
A healthy root system is the key to growing any plant and orchids are no exception. For the beginner orchid grower, trust the professionals to provide you with the correct growing medium. Orchid potting mix is specially designed for orchids and other epiphytes such as bromeliads and anthuriums. This soil is made of western bark and coconut husk chunks. Limestone has been added to the mix, so it has the correct pH balance for healthy growth. This formulation does not compact, allowing air and water to be absorbed by the plant’s roots.
Choose a smaller pot to place your orchid in, making sure that there are plenty of holes in the pot itself for drainage. Avoid planting directly into decorative pots with no drainage holes. Remember, the enemy of orchids is over-watering. Some orchids, such as cymbidiums, will require longer pots to accommodate exceptionally long root systems.
Clay pots are acceptable for transplanting into as they breathe, providing excellent drainage. Clear plastic pots are good too as they allow sunlight to the roots. These allow you to inspect the root systems without disturbing the orchid.
You can also us glazed orchid pots created especially for this type of plant. There are holes throughout the sides of the pot so line it with sphagnum moss before adding your potting mix.
Remove the orchid from its original pot, making sure to cut off any dead or rotting roots. Divide the root material into several different sections, before placing the plant in its pot. The most mature section of growth should be positioned towards the bottom of the pot and newer growth should be positioned near the sides of the pot. Lightly add the potting mix, barely covering the root system.


