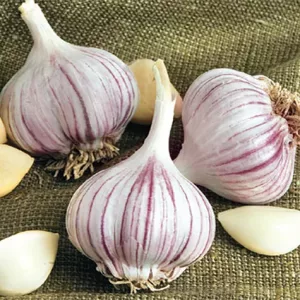
I have been getting quite a few questions about growing garlic, so I thought I would devote this week’s article to the subject. Garlic is quite easy to grow. The key to success, as with growing so many other things, is paying attention to the conditions that best suit your crop.
For garlic, it is imperative that you choose a spot that has well drained soil. You will be planting the garlic cloves in the fall and they will be sitting dormant, only producing roots, until the soil warms up next spring. If you plant in a low-lying area or a spot with heavy, poorly drained clay or silty soil, your garlic will most likely rot.
If you don’t have a garden with well drained soil, consider building a raised garden bed to get above the clay. I did this for my vegetable garden. I used 2” x 12” cedar boards to frame the garden and filled it with a mixture of loam and compost.
For growing garlic, the preferred location would be one that gets full sun. If that is not possible in your yard, be sure the spot you choose gets least half a day of sun.
Typically, mid to late October is a good time to plant in our area. You want the soil nice and cold so strong roots form without the cloves sprouting leaf growth. I remember the first time I planted garlic. I bought the bulbs in September and planted right away. We had a very mild fall and my garlic sprouted!
The best garlic to plant here in the north are the hardneck varieties. They have great flavour and when harvested, store very well. Be sure you are buying nice firm bulbs and as a word of caution, don’t buy garlic sold in the vegetable section of the grocery store. It may have been treated to ensure it won’t sprout as its transported to the store. Garlic you buy from a garden centre is meant for planting. You can also plant any of the garlic offered at local farm markets.
Prepare your garden by working a 1” layer compost or composted manure into the soil. Then, using a trowel or small shovel, dig a 3” deep trench in your garden. Sprinkle bonemeal into the bottom of the trench and scuff it into the soil so it’s available for the garlic roots once they form.
Carefully break the garlic bulb into individual cloves and push them into the bottom of your trench, pointed end up, spaced 6” apart. Slowly backfill and firm soil around the cloves ensuring they stay upright. Leave a bit of a divot along the trench as you work. When you water, moisture will go straight down into the soil, right to the cloves. Watering also ensure there are no air pockets around the roots.
A word of caution: if you are planting in raised beds, keep garlic cloves at least a foot away from garden edges. If we have severe cold weather before an insulating layer of snow falls, garlic too close to the edge may not survive. I learned this the hard way when I first planted garlic in my raised bed. I lost the entire outside row and the last cloves in the rest of the rows that were too near the edge.
Once your garlic bed is planted, sit back, and enjoy the thought of harvesting next season!
In spring, I make a point of working organic fertilizer along my garlic rows once I see green shoots coming up. As an alternative, you can top-dress your rows with more compost in early spring.


